Last Modified September 21, 2022
- Home
- eCommerce
- Origins
- software_DNA Configuration
Adding the DNA Connector for Origins
For each of the DNA Products that will be receiving orders from Origins, you will need to:
- Create a DNA Connector
- Add Origins SKU(s) to the DNA Connector
To create the DNA Connector for a given DNA Product:
From the DNA Control Panel, select the specific product and scroll down to the eCommerce Connection
section
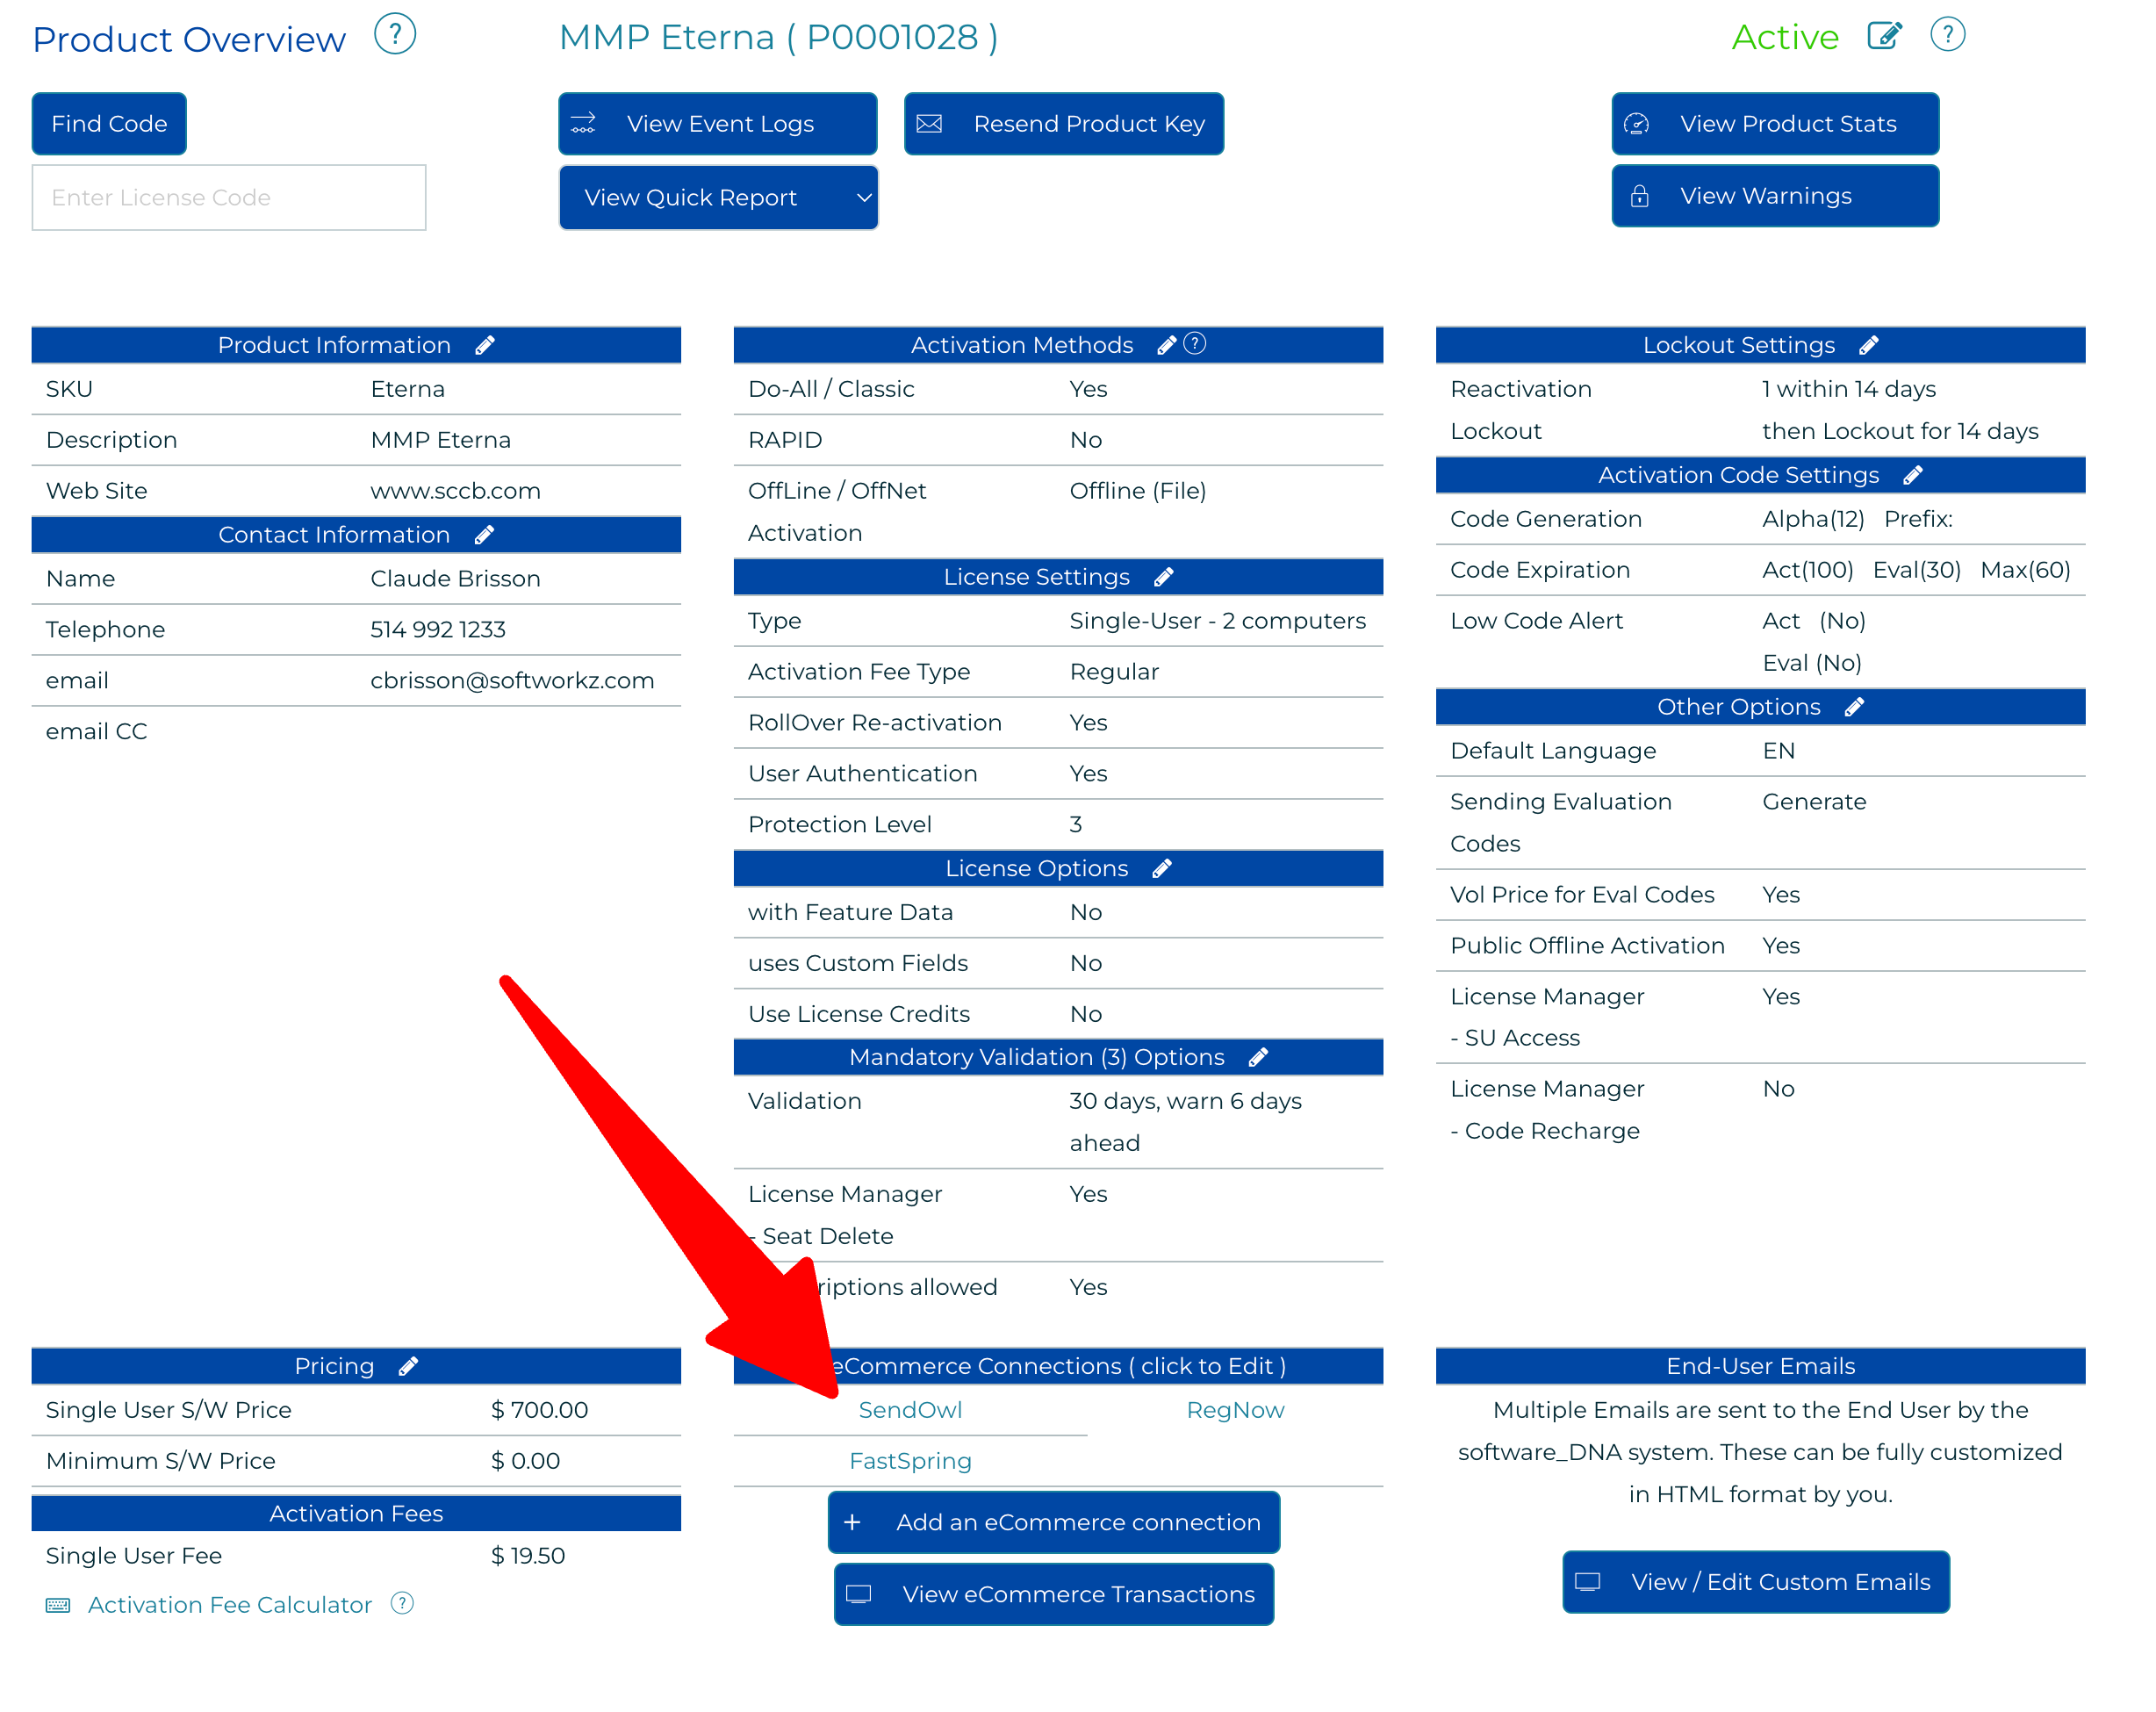
If this is the first time you are setting up for integration with Origins, click on + Add an eCommerce Connector
and choose the eCommerce System Origins from the scroll down menu.
If the Origins integration is already set-up, click on Origins to go to the
Origins Configuration screen.
In the Connector Configuration screen, configure the following options:
| Account ID |
Enter your Origins "Account ID" from your Origins account (your Account ID under
"Setup -> Account Setup -> Account" |
| Confirmation Email |
If you would like to be notified of each Origins transaction processed by software_DNA,
select the Receive Transaction Confirmation Email option. software_DNA will send an email
to the Product_Contact person for this product with key information taken from the transaction.
|
| License Fulfillment |
Choose from two License activation code options:
| Immediate - "Just in Time" |
The DNA Server will create a new License Activation Code for this Product, reserve it and
send it to the Buyer. The License Code will be generated using the Code Length and Code Type
specified in the Product configuration.
|
| Reserve |
You will UPLOAD or GENERATE codes. The DNA Server will
reserve the next available License Activation Code for this Product and send it to the Buyer.
You will need to request this option by sending an email to support@softworkz.com.
|
|
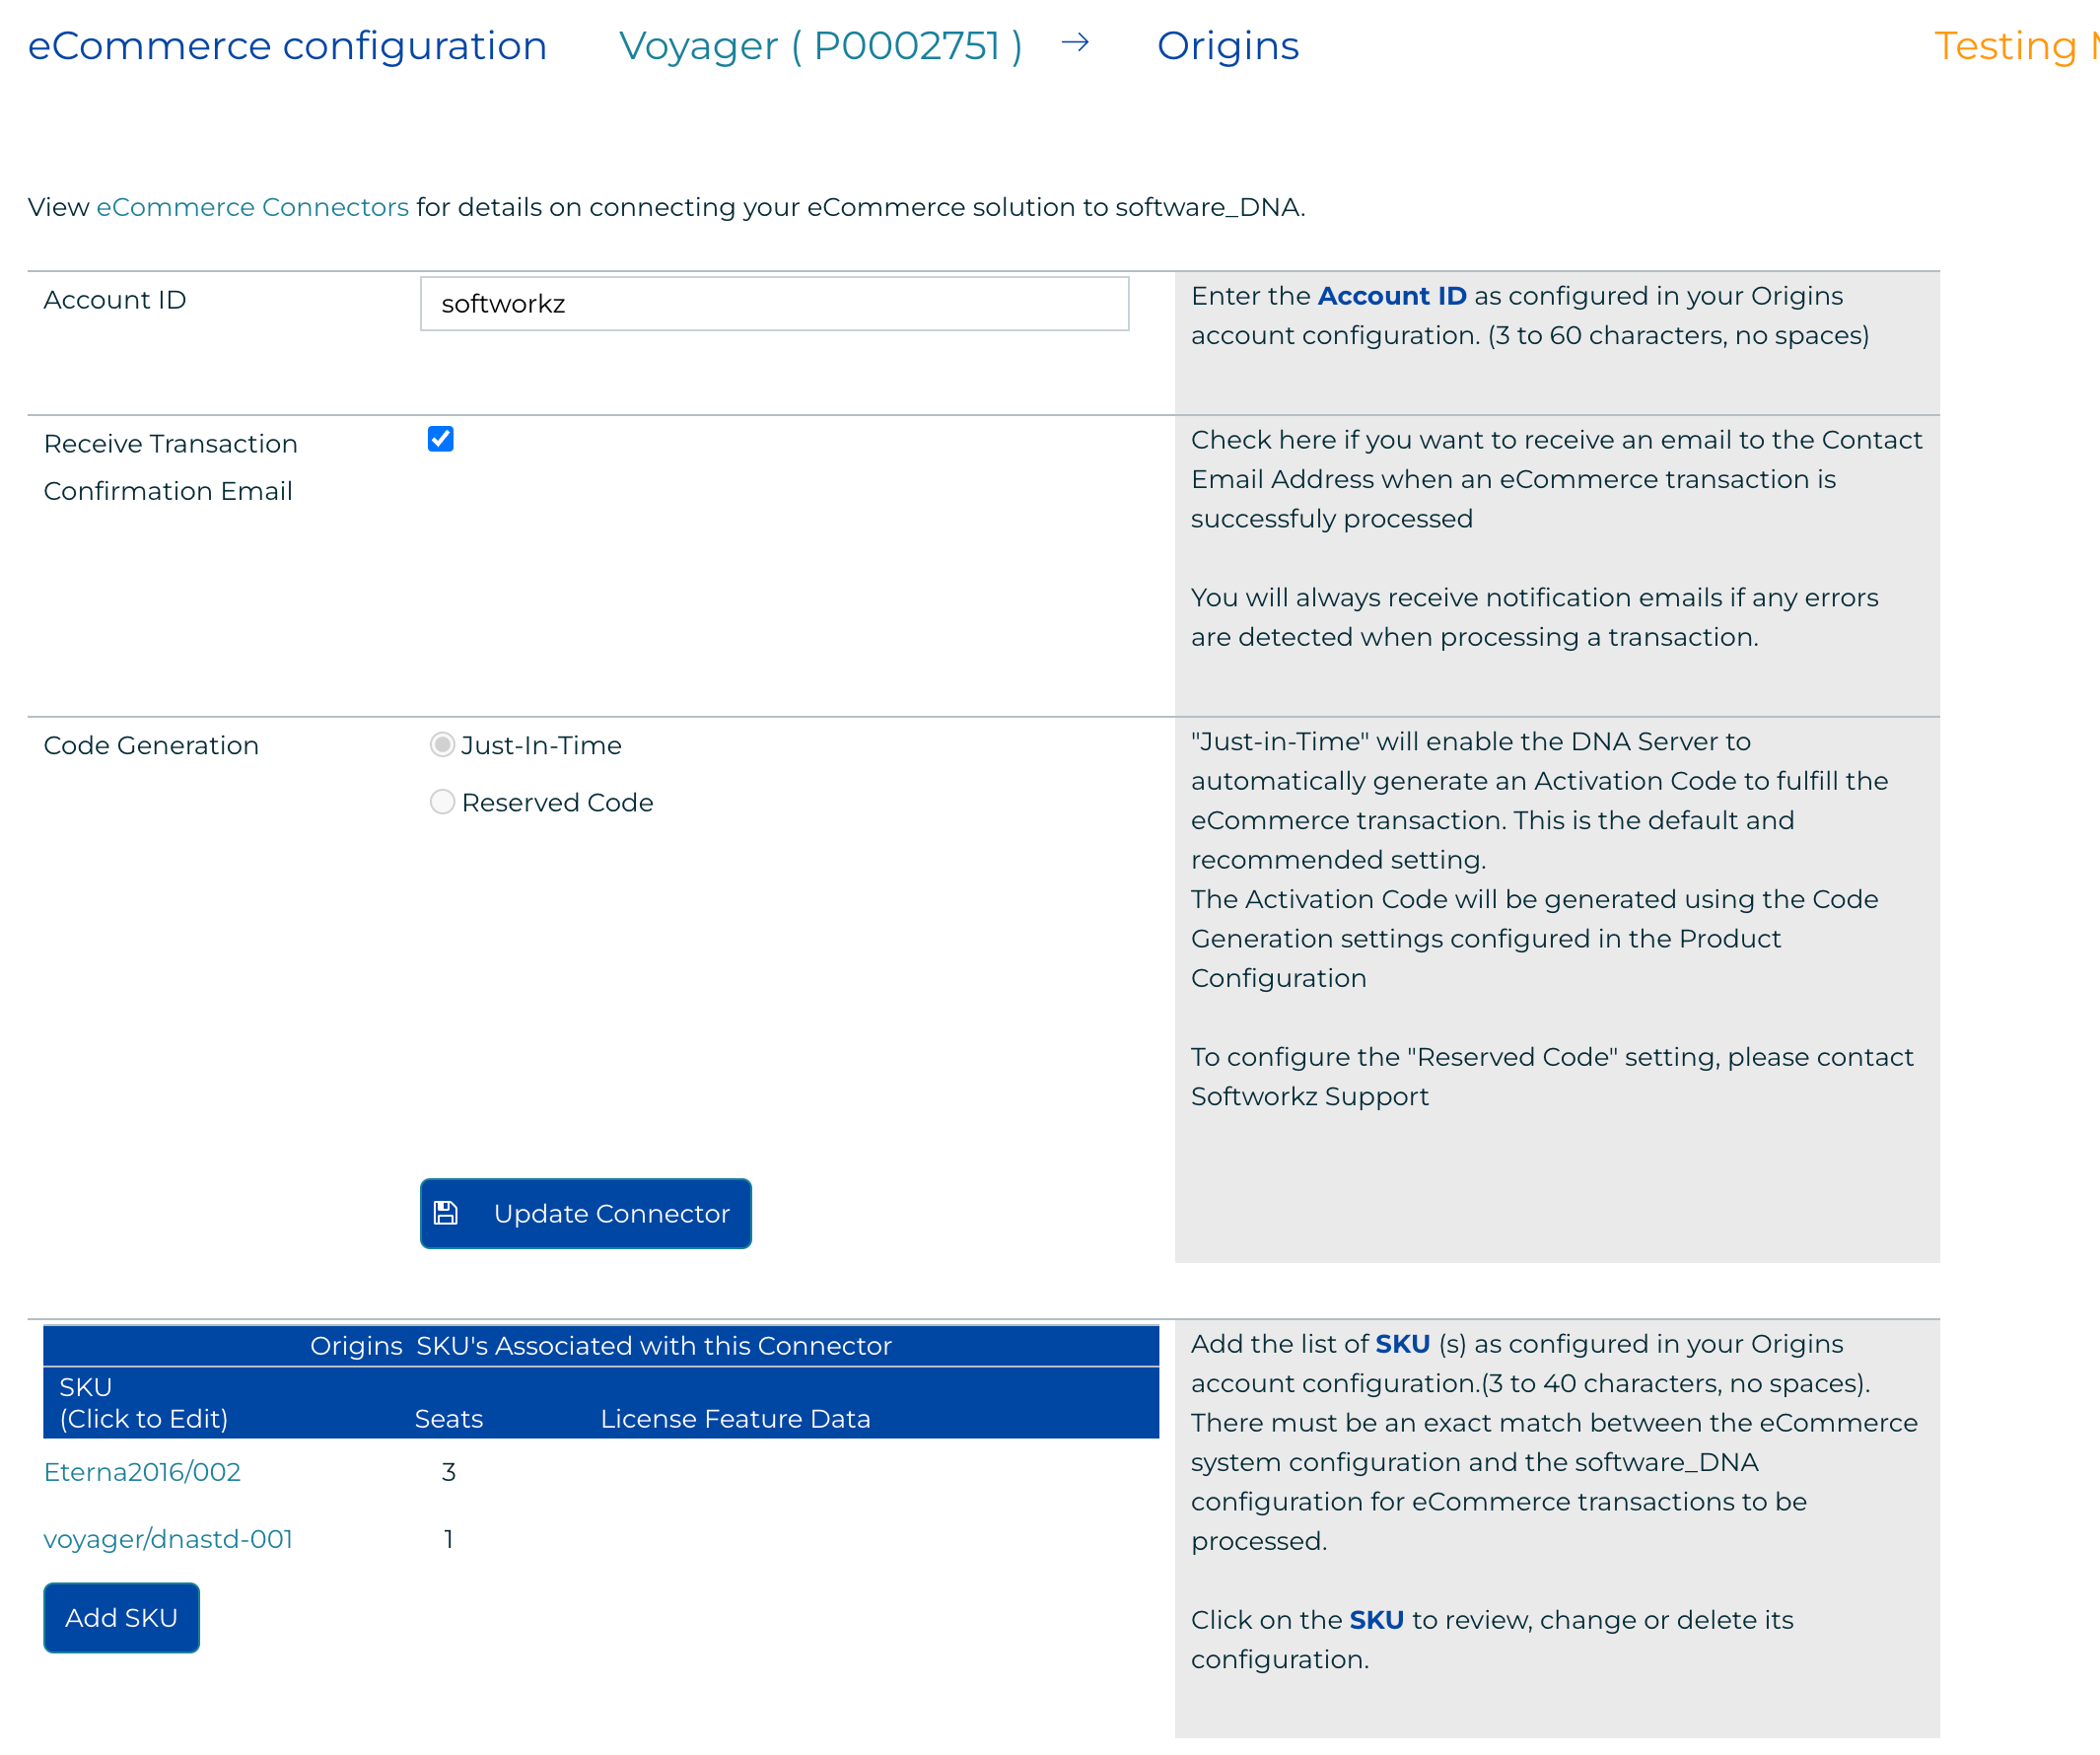
-
Click on Create Connector (or Update Connector if you are modifying an existing configuration) to
save the Connector configuration.
Once created, the Add Product SKU button will appear, and you will need to configure each
Origns SKU associated with this DNA Product as shown in the next section.
Adding Origins SKU’s to the DNA Connector
For each Origins SKU (configured in Origins as Product Options) that will use this DNA Product,
you will add a SKU Configuration as follows:
From the Origins Connector Configuration screen, click on ADD Product SKU, or click on
an existing Product SKU, to bring up the SKU Configuration screen:
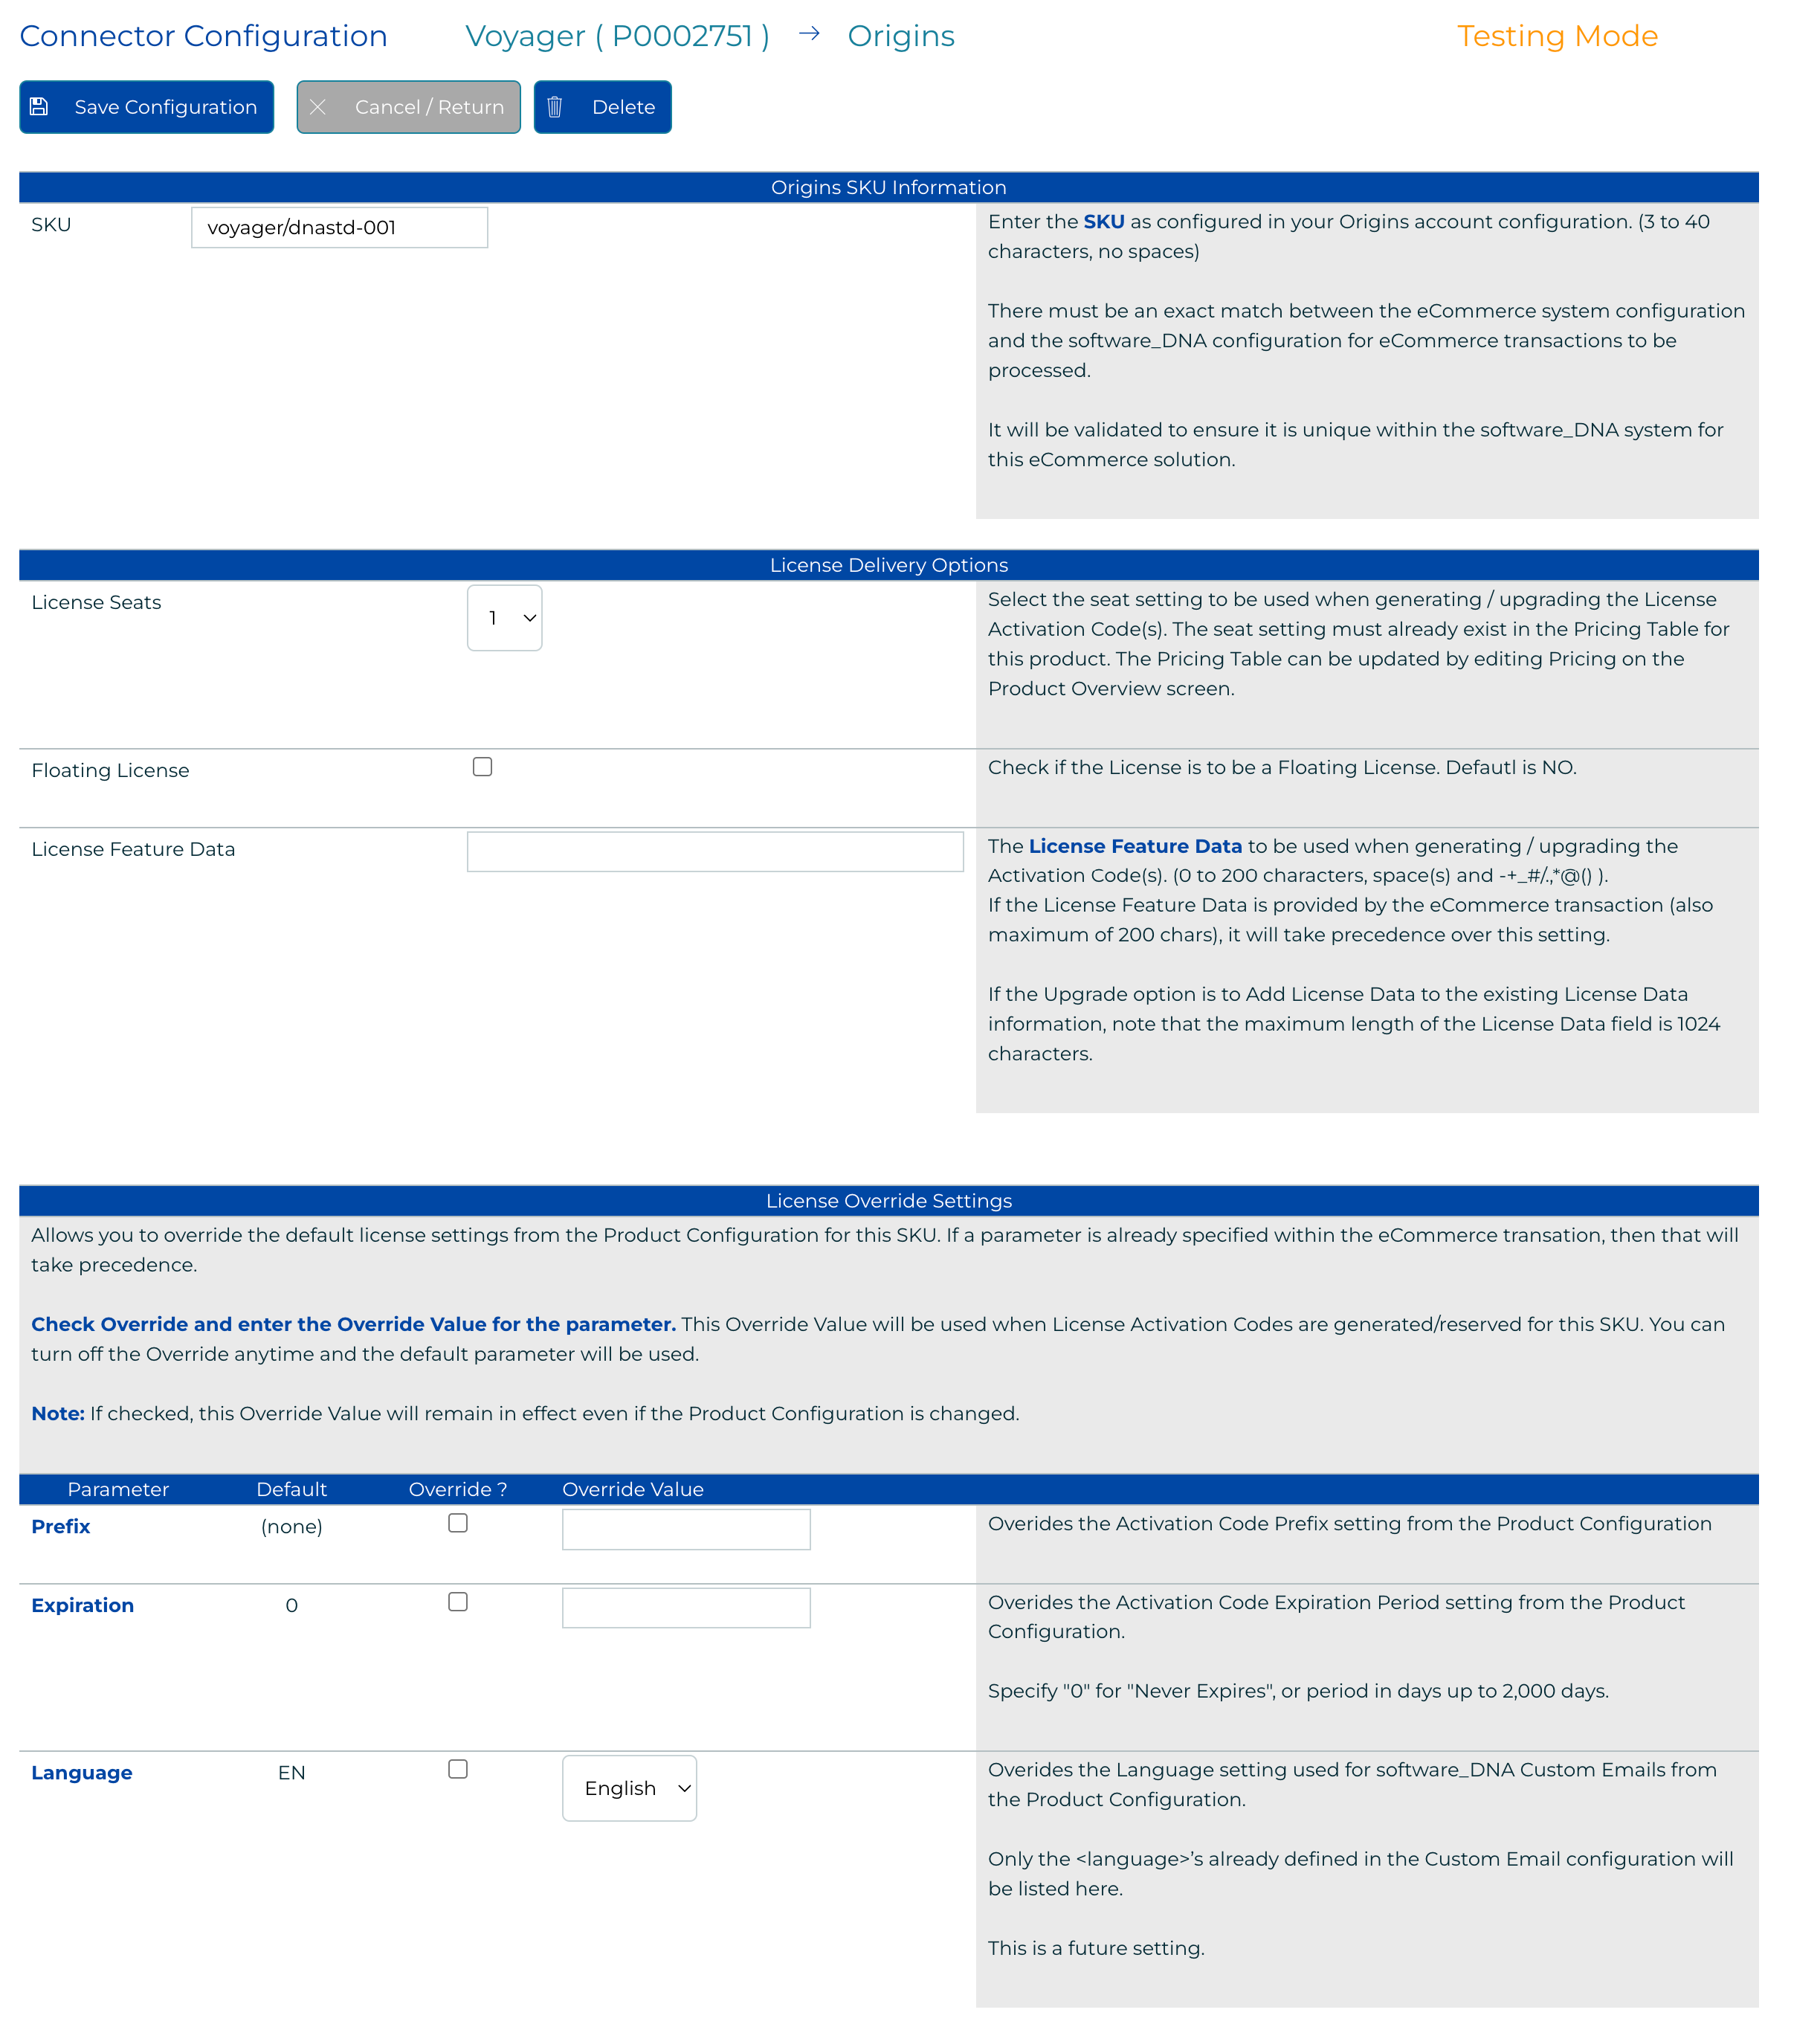
Enter the SKU that you entered in the Origins Product configuration
for this product / subscription. This can be different then the software_DNA Product SKU.
You would use different RevenueWire SKU’s for the standard product versus an upgrade product in Origins,
or for different multi-user seat settings.
Up to 25 Origins SKU’s can be configured per DNA Connector
If you have defined multi-user licenses in your Product Configuration, select the <License Seats> that will be used
when generating or upgrading a License Activation Code for this
SKU.
If you use Feature-based licensing, enter the default <license_data>
that will be used when generating or upgrading an Activation Code for this SKU
(this field will not appear if you have not enabled this option).
If required, you can specify Override settings for this specific Origins SKU.
Override settings will be used instead of the Default DNA Product configuration settings when generating the License Code
for this transaction:
- Check the Override Checkbox for the override setting to be used
- The Prefix will override the
<Prefix> setting of the DNA Product
- The Expiration Period will override the setting of the DNA Product
- The Language will override the setting of the DNA Product
Click on SAVE to save this SKU configuration
The UserPurchaseDate, License Activation Code, Buyer Email
and the Origins TransactionID are stored and available for viewing in the Product Configuration
screen or the Code View screen or for
download from the DNA Control Panel under the menu Reports.
You can retrieve the complete transaction information directly from your Origins account at any time.
Please consult the Origins web site for these options.