Last Modified October 2, 2026
- Home
- Guides
- Must Read Topics
- Adding to IDE project
- Adding to XCode
- Copy the libdna.dylib and DNA_INT files to the root directory of your Project.
Use the DNA_INT file appropriate for your
programming language.
- While viewing the "Project Navigator" window :
select from the top menu File -> Add File to <name> and add the above files to your project
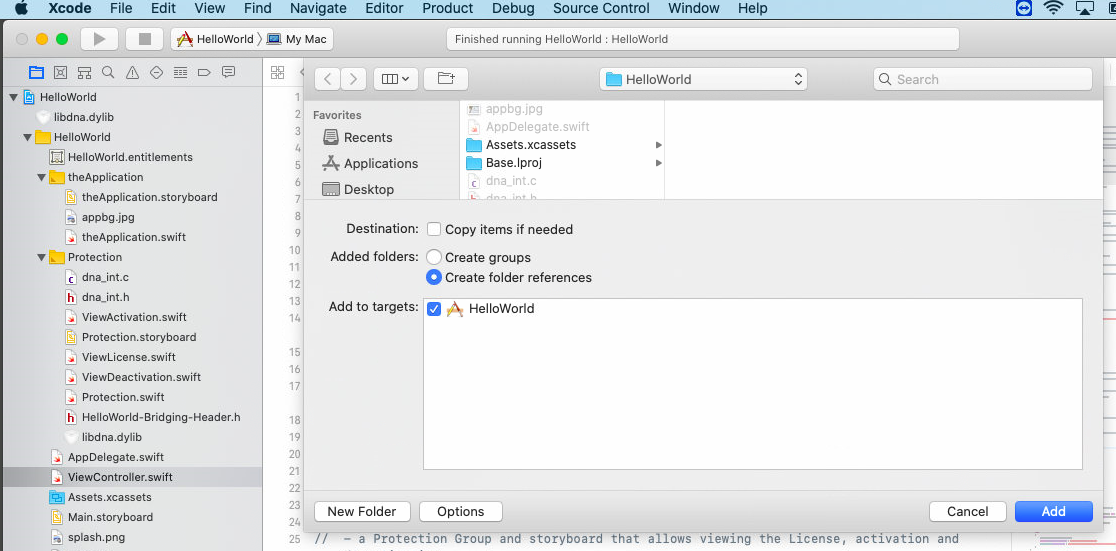
you can then move the files in the "Project Navigator" to organize your project, for example:
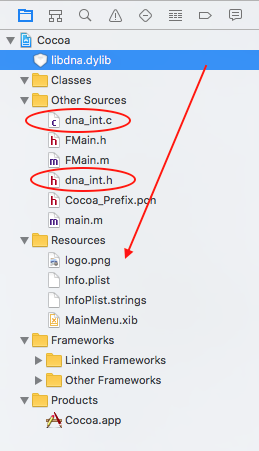
- in ObjC project, move the DNA_INT files to the "Other Sources" folder and the
libdna.dylib file to the "Resources" folder
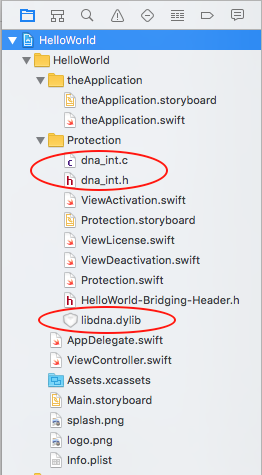
- in Swift project, you can leave all files in the root project directory, or any sub-directories you have
Project in Obj-C
|
Project in Swift
|
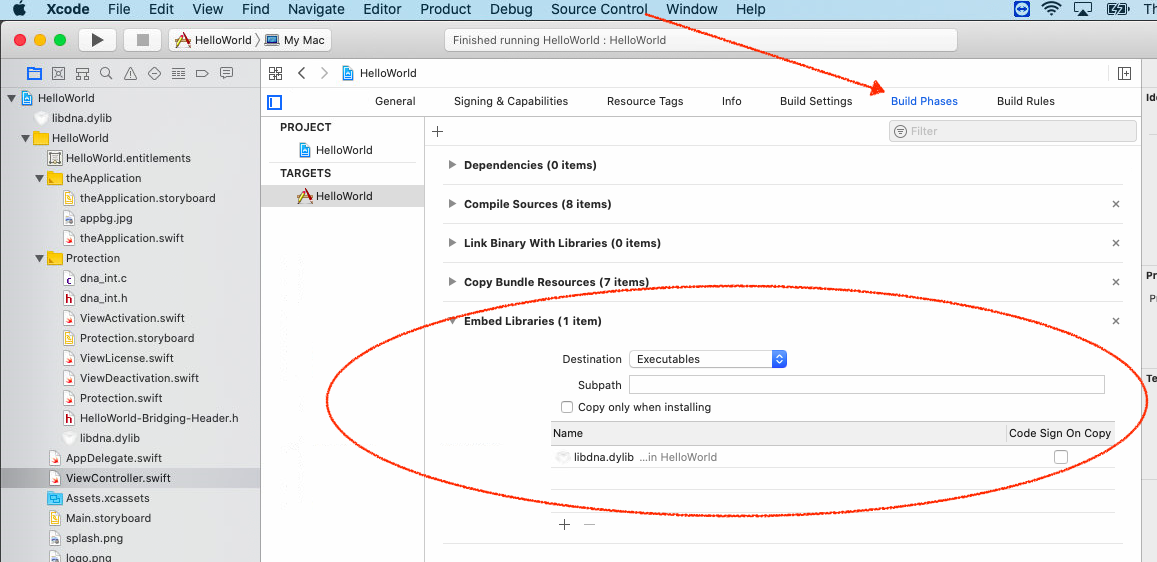
- under the TARGETS -> <appName> -> Build Phases -> Embed Libraries:
- add a Embeded Library (click on + and select the libdna.dylib file in your project)
- select Destination Executables
- disable Copy only when installing
- disable Code Sign on Copy if you want to authenticate the DNA Library Hash. Your project
settings may not allow this, in which case, do not authenticate the DNA Library in your App.
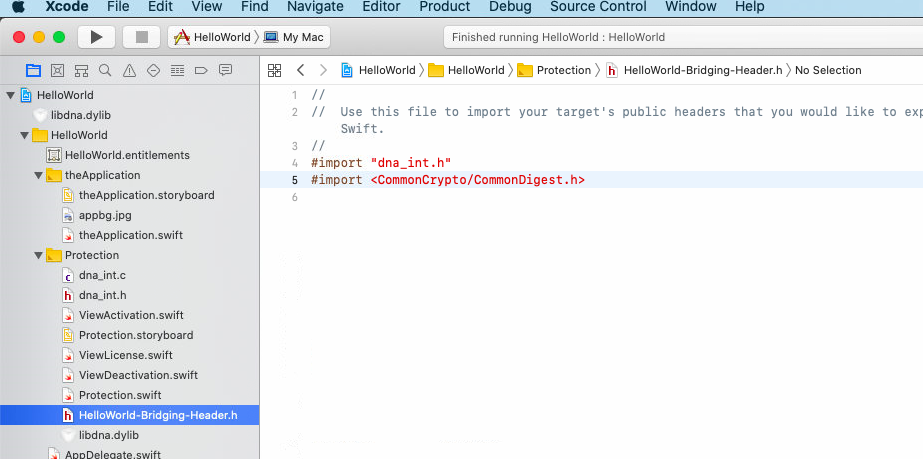
- if building a SWIFT App, you will need to add a Bridging Header for the DNA_INT C-based files:
- using File -> New -> File, click on "Header File" and name it:
<appname>-Bridging-Header
- in the Header file, add the following:
- #import "dna_int.h"
- #import <CommonCrypto/CommonDigest.h> // this is used for SHA256 check of library, optional
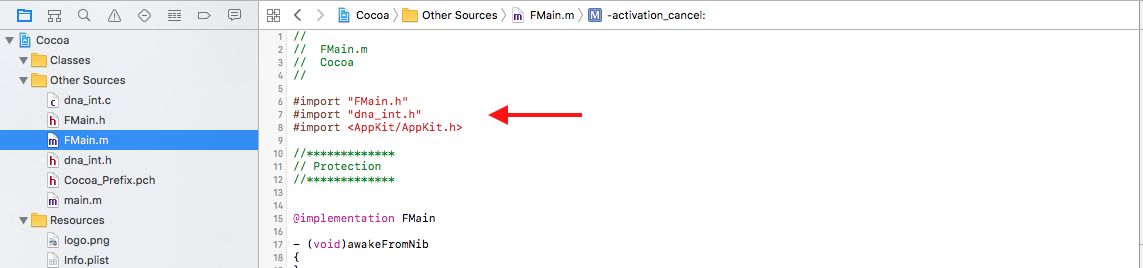
- For Objective-C projects, you will need to add
#import "dna_int.h" statement to any source file
that will be using the DNA API calls
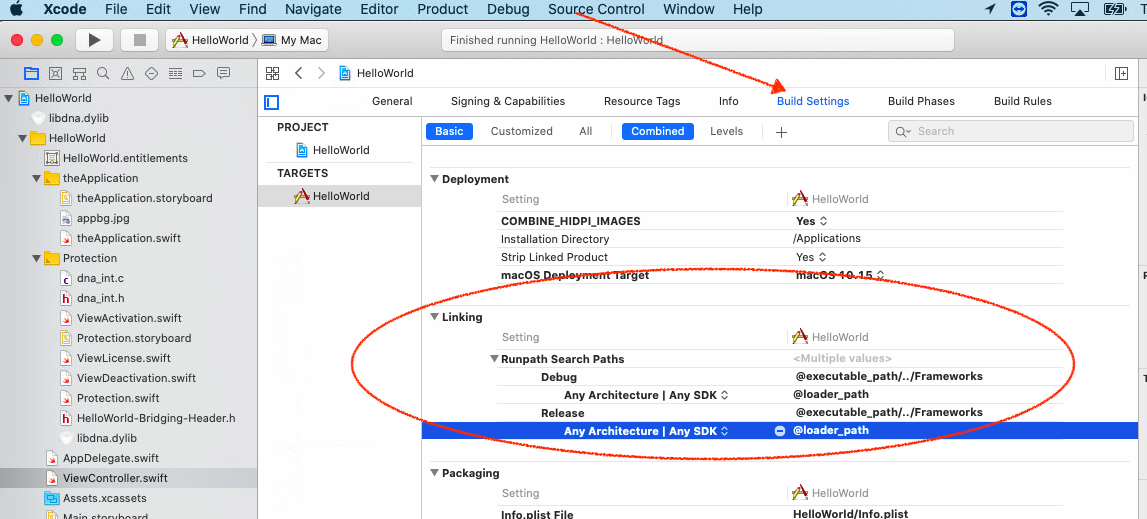
- for some projects, and if building a SWIFT App, you will need to add RunPaths in the "Linking" configuration of
your project:
- under the TARGETS -> <appName> -> Build Settings -> Linking
(this links the Library in the Package Contents of the App)
- add a Runpath Search Paths for both Debug and Release:
@loader_path
You should now be able to add DNA API calls in your project as per our Implementation Guides.
When running the Application, if you get an exception error on the first DNA API Call, this may indicate that the
DNA Library was not copied to the Package Contents / MAC OS directory of the application. Possible actions:
- recheck the Build Phases of your project to ensure the libdna.dylib is part of the Embed Libraries
- check that the correct library is being used (32-bit or 64-bit)
- manually copy the libdna.dylib into the Package Contents / MacOS directory
- delete the Derived Data directory of your project to clean it
- run a "Build Clean" from XCode
Considerations with Code Signing and App SandBox
Code Signing, and App Sandbox are important requirements if you plan on distributing
your Application via the Apple Store, and/or if you want
to ensure no warnings are issued when your Users downloaded your Application from the Apple Store or a 3rd party e-commerce
solution.
| Impacts of Code Signing |
|
With code signing, it is not required to authenticate the libdna.dylib.
|
| Impacts of App Sandbox |
- when App Sandbox is enabled, the Package Contents directory cannot be
modified at run-time, and the CDM License file cannot be stored in this location.
- when App Sandbox is enabled, ensure the following settings are enabled:
- Network -> Incoming Connections
- Network -> Outgoing Connections
|
| Without Code Signing |
|
Calculate the hash signature of the libdna.dylib file and compare against the
unShuffled (unsigned) hash value provided
with the DNA Library
|
Supporting multiple MAC Users (V6.00)
To allow different Users on the same MAC computer to share the same License Code:
- use a Multi-Computer or Multi-User License
- set up the DNA Properties as follows:
DNA_SetProperties("CDMPathName","/Users/"+NSUserName()+"/Library/Application Support/<app_name>/<app_name>.CDM")DNA_SetProperties("userID",NSUserName())
The NSUserName() function will ensure each CDM License file is unique and specific to the MAC User
The Users sharing the same License may be on different computers.
Other locations that can be used:
| / Users / <userName> / <app_name> /
<app_name>.CDM |